How to restore system reserved partition windows 10? When we accidentally deleted system reserved partition Windows 10, we want to recover the partition because it is essential for Windows boot. However, since we are unable to install and launch recovery software on the computer directly, we may use Bootable Media Builder feature in the MiniTool Partition Wizard to restore the deleted boot partition. So, we need to create a bootable media with a USB flash drive on another healthy computer installed MiniTool Partition Wizard in the first place.
What is MiniTool Partition Wizard?
MiniTool Partition Wizard is a third party software which could help you to create, delete, merge and split partitions It also helps you to undo diskpart clean command as well as recover files from unallocated space. So, if you accidentally delete system reserved partition Windows 10 and you don’t know how to restore it, this third party software Partition Wizard could be a big help. You may use it to solve all partition management issues easily, not just recover system reserved partition.
How to make an ISO file with a USB flash drive?
Attention:
1. MiniTool Bootable Media Builder is available on all registered editions of MiniTool software. For those who are using the Free Edition and Trail Edition, please upgrade to Paid Editions before accessing.
2. MiniTool Bootable Media Builder will format the USB flash drive while building MiniTool Boot Flash Drive. Please make sure that the USB flash drive can be formatted.
Step 1. Prepare a USB flash drive and connect it to another healthy computer.
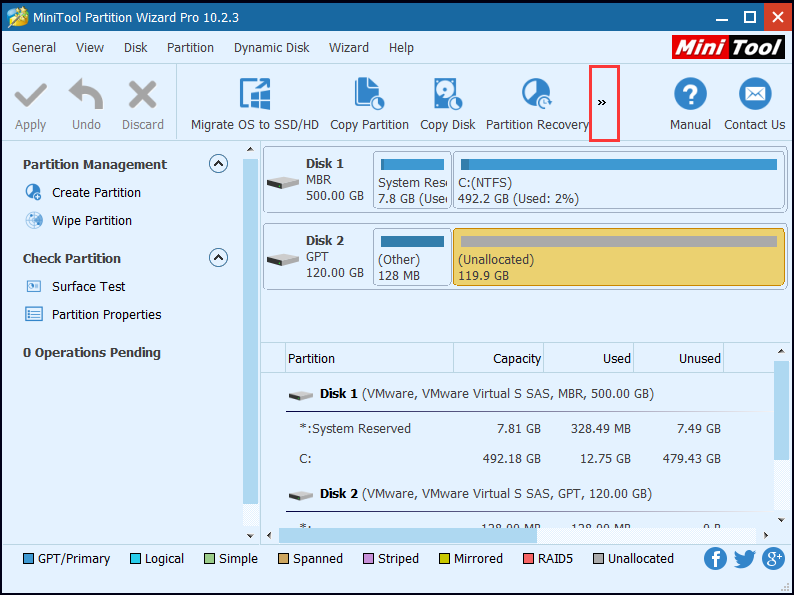
Step 2. Buy MiniTool Partition Wizard Pro Edtion and launch Bootable Media Builder (you may see this feature by clicking the More Tools icon marked in the red box) from MiniTool software to the main interface.
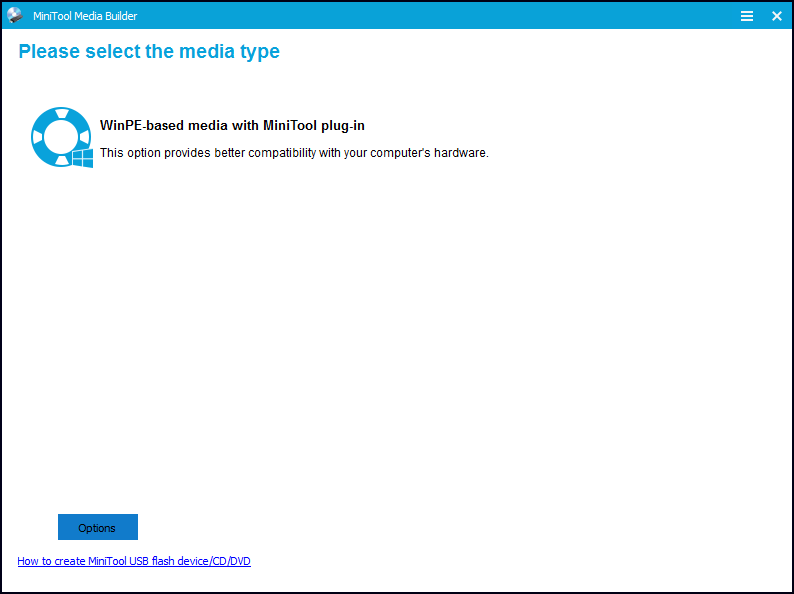
Step 3. Select WinPE-based media with MiniTool plug-in to continue.
Step 4. Check USB Flash Drive option and select the correct USB flash drive. Then click Yes to confirm that you want to burn the boot flash drive (You will see a USB flash drive if you plug the device into a USB port.). 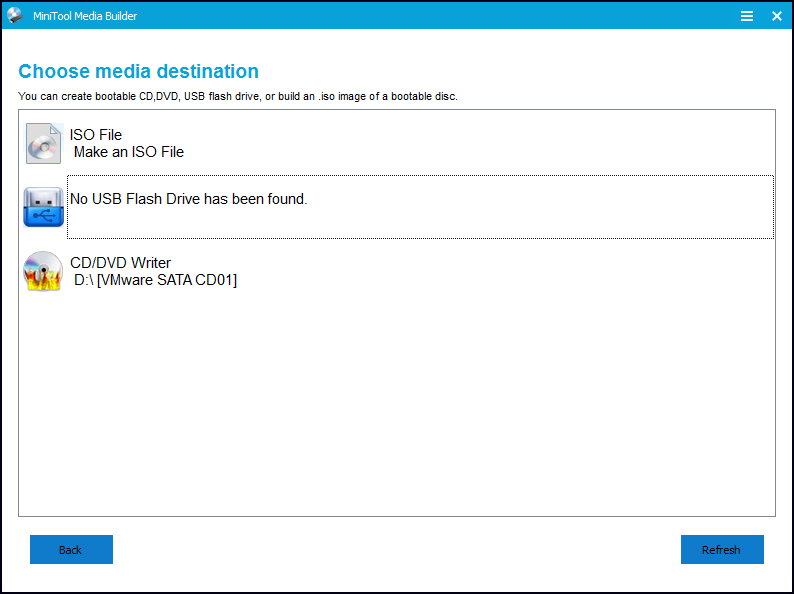
Step 5. Please wait patiently while MiniTool Bootable Media Builder is generating boot files on the flash drive. Finally, click Finish after successful burning.
Then you may enter the BIOS to change the BIOS boot order, giving the USB device boot sequence priority over the hard drive.
How to boot from the USB flash drive?
BIOS is an acronym for Basic Input/Output System and also known as the System BIOS, ROM BIOS or PC BIOS. When you turn on your PC, its BIOS runs a power-on self-test (POST) to ensure that the machine’s devices are connected and working properly. If the test finds no problems, the BIOS turns over control of your PC to another piece of software, typically the operating system.
If you want to boot from the USB flash drive, remember to set the USB flash drive to the first boot device. Here is how you can do this:
Step 1. Plug the USB into a USB port, then start your computer and continuously press a key on the keyboard before the BIOS hands over control to Windows. You have only a few seconds to perform this step.
Kindly Remind:
Pay close attention to the first screen that appears. Look for a message that indicates which key you need to press in order to access the BIOS. That key is likely to be a function key such as F1, F2, or the Delete key. On some computers, entering the BIOS may require pressing another key or a combination of keys. Keep your eyes open for an on-screen message that says something like: Press F1 to enter setup, BIOS settings: Esc, Setup = Del, System configuration: F2.
Step 2. Select Boot Device. Look through the options (being careful not to change anything) for a setting called “Boot Device,” “Boot Order,” or something similar. Select that option.
Step 3. Choose USB-HDD and press Enter. Depending on your BIOS, you may need to use the Page Up and Page Down keys to move your selection to the top of a list, instead.
Step 4. Exit out of your BIOS, saving your changes. Usually, this option is under “Exit” on the main menu, or available via a keyboard shortcut listed somewhere on your screen.
Step 5. Reboot your computer. Make sure your USB drive is in your computer. Your computer should boot into the USB drive instead of your normal operating system.
Then you will see the main page of the Partition Wizard boot edition. With its Partition Recovery feature, your accidentally deleted system reserved partition Windows 10 could be recovered.
How to use Partition Recovery in MiniTool Partition Wizard ?
Step 1. Select the system reserved partition that you want to recover by right-click and choose Partition Recovery from the Wizards menu.
Step 2. Select the disk which contains deleted system reserved partition.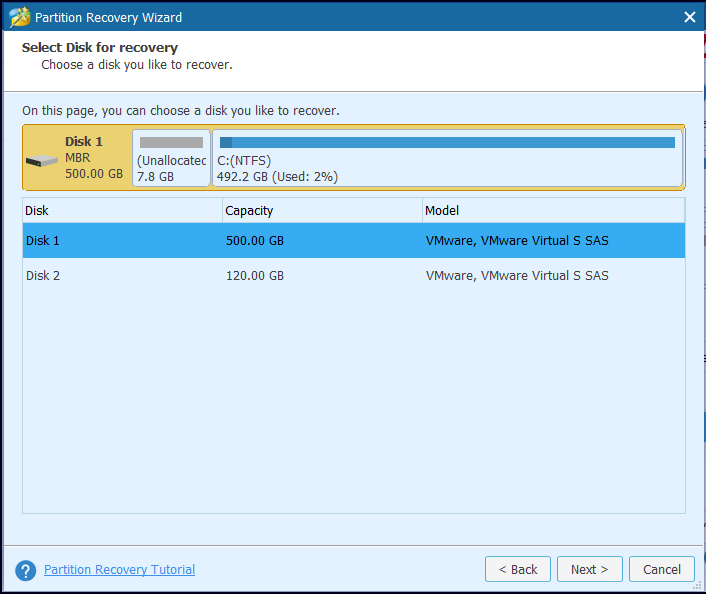
Step 3. Select a scanning rage and click Next. This method takes less time. If you cannot find the deleted partition, you can select Full Search later.
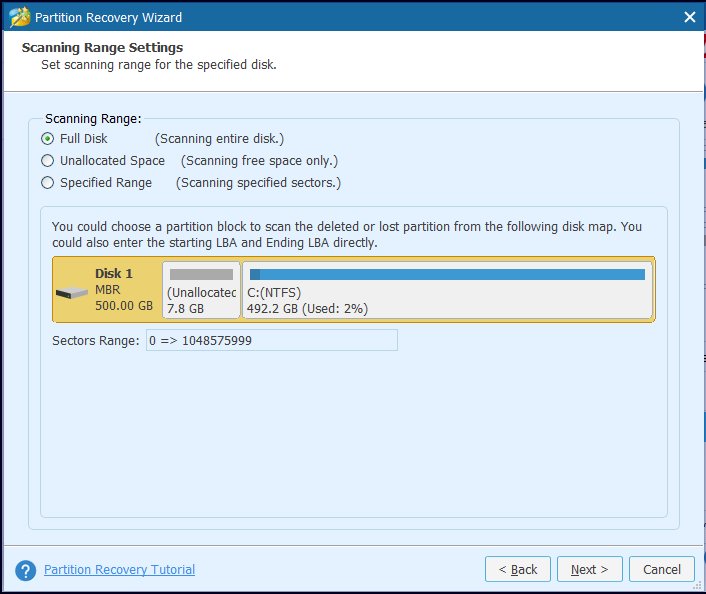
Step 4.Select a scanning method and click Next.
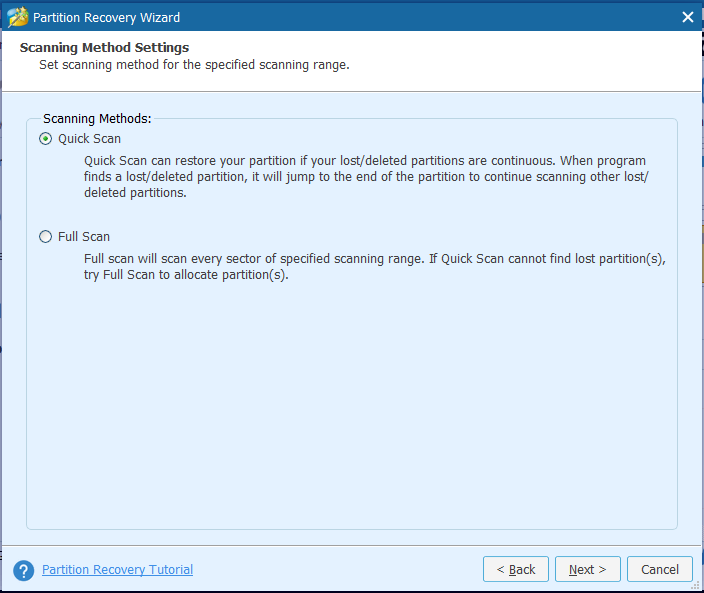
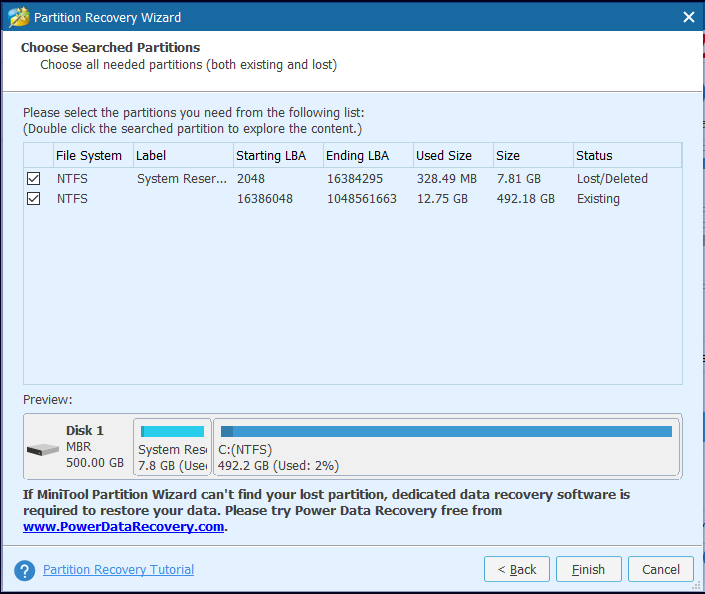
Step 5. Select the deleted boot partition in the following list and click Finish. For security, you can click Explore files in the selected partition and view files to confirm. (After scanning, you will find a deleted boot partition under the following list in the screenshot. )
Step 6. Select the recovered system reserved partition and set it active.
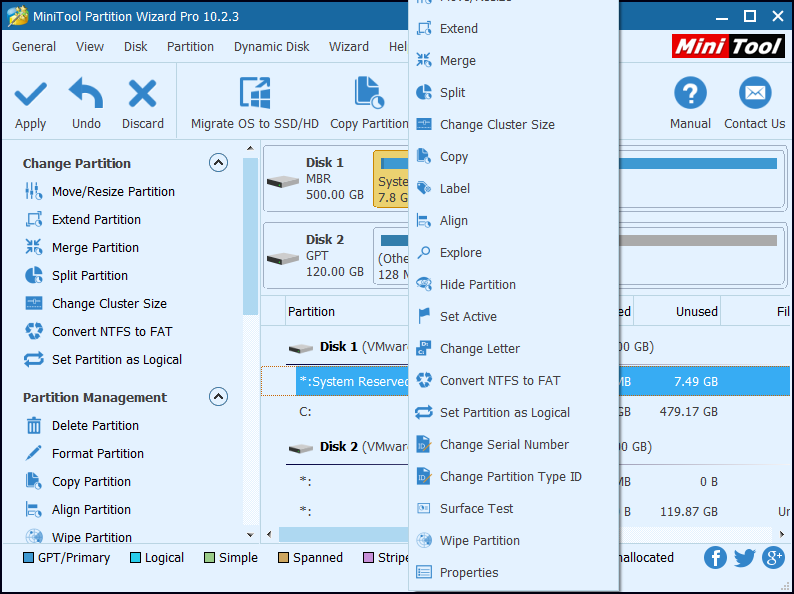
Step 7. Click Apply. Then you may exit this window and boot your computer.
Summary
Sometimes you may lose partitions by accidental deletion, With Partition Wizard ,this powerful partition recovery tool, you may recover system reserved partition easily. If you accidentally delete system reserved partition Windows 10, you just need to follow this post step by step. Then system reserved partition recovery will be completed in an effortless way.


